For all those youngsters dreaming of making films—even if it’s just on your phone or a basic camera—let’s talk green screens. You might’ve seen those bright green cloths in behind-the-scenes shots and wondered, “What’s even going on here?” But that same cloth, with the right setup, can turn your boring wall into a beach, a battlefield, or even space.
It’s not just for big-budget movies. Even small creators—YouTubers, short film makers, or students working on college projects—are using green screens to give their videos that extra edge. And you don’t need high-end gear either. If you know how to use it properly, even a simple green cloth and basic lights can take your video to the next level.

What Even Is a Green Screen?
A green screen is a solid-colored background—usually bright green—used to digitally replace that color with something else in editing. This process is called chroma keying. Basically, editing software picks out all the green in the shot and removes it, letting you add any background you want. From space battles to dreamy mountains, what starts as a plain green wall becomes the canvas for your entire scene.
How to Use a Green Screen ? : Setup → Shoot → Action
Step one is setting it up properly, because no matter how good your camera is, if your screen’s all wrinkled and weirdly lit, it’s gonna show in post. So, hang that green screen flat. Use clips, tape, or stands—whatever you’ve got. Just make sure there are no wrinkles and no shadows falling on it. Place your subject a few feet in front of the screen to avoid that green light bouncing back onto them (called spill)
Now for the camera. Doesn’t matter if it’s a DSLR or your phone—just keep it stable. Use a tripod, stack some books, lean it against something… but don’t go handheld unless you’re going for that shaky look. And frame your shot well, make sure your subject doesn’t step out of the green background. That’s a headache to fix later. Light your subject separately from the green screen. Two soft lights on the screen, and maybe one or two on the person, depending on your vibe. Even lighting is key.
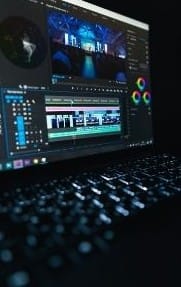
Now the Real Work Starts: Tools & Editing
If you’re on PC or laptop, tools like DaVinci Resolve, HitFilm Express, or even Adobe Premiere Pro (if you’ve got it) are solid. On mobile, try CapCut. All of them have a chroma key feature to remove the green background. Just pick the color (usually it auto-detects green), and boom—the background disappears.

Once the green is gone and your new background is in place, it’s time for the extra touches. Add a bit of blur to the background if it’s too sharp. Match the lighting of the background with your subject—this makes the scene look like it was actually shot there.
Then comes color grading. It sounds fancy, but even small tweaks—like adjusting brightness, shadows, or giving your shot a slight warm or cold tone—can blend everything together. That’s the difference between “looks like it was edited” and “feels like a film.”

Why Green, Not Pink or Yellow?
So here’s the simple truth—green doesn’t match human skin tones. No matter your complexion, our skin just doesn’t naturally have that bright green tint, which makes it easy for software to remove it cleanly. That’s why green is the go-to.
Blue screens are also used, especially if your subject is wearing green. The process is the same, but blue tends to be a bit trickier to light properly, and green is more camera-friendly. As for pink, yellow, or red—they just overlap too much with skin and clothing, which makes the chroma key process messy and unreliable.
Cloud Computing in 2025: What You Should Know

For Those Dreaming Behind the Camera…
If you’re one of those folks who dream of seeing their name in film credits or just want to build something cool from your room, start here. The green screen isn’t just a tool—it’s a blank canvas. It lets your imagination run wild, even if your room’s a mess and your budget’s close to zero.
You’ve got the tools. You’ve got the passion.
Now make something worth watching.


Pingback: Cloud Computing in 2025: What You Should Know -